
Ripstiking, a popular form of outdoor recreation, combines elements of skateboarding and snowboarding into a unique and thrilling experience. One essential skill to acquire when riding a Ripstik is the ability to slow down safely and efficiently.
In this article, we will provide you with a detailed guide on how to slow down on a Ripstik, enabling you to have better control over your speed and enhancing your overall riding experience.
I. Understanding the Basics:
- Proper Stance: Begin by standing on the Ripstik with your dominant foot positioned slightly towards the back, with the other foot placed at the front, providing stability and balance.
- Balancing Techniques: Distribute your weight evenly between both feet and keep your knees slightly bent. This will help maintain stability and control while slowing down.
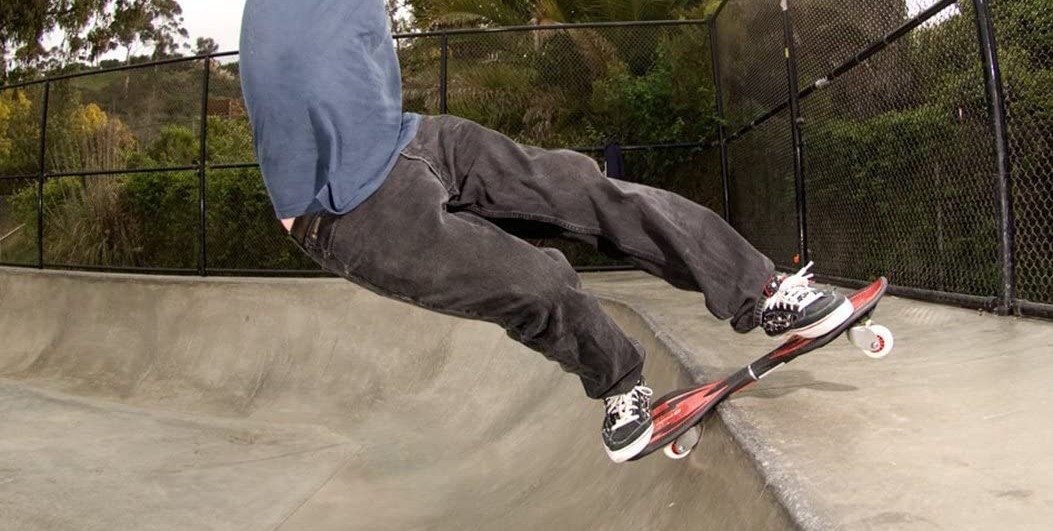
II. Braking Techniques:
- Foot Drag: The simplest method to slow down on a Ripstik is by using the foot drag technique. Lower your rear foot until it contacts the ground gently. Apply light pressure to create friction between the foot and the ground, gradually decreasing your speed.
- Carving: Utilize the Ripstik’s unique design to your advantage. By making sharp, controlled turns or carving, you can naturally reduce your speed. Shift your weight to the front foot and use your body and hips to initiate turns, allowing the Ripstik’s caster wheels to slow you down.
- Controlled Turns: Similar to carving, controlled turns involve using your body and hips to initiate turns. However, instead of sharp turns, focus on making wider, controlled turns to gradually decrease your speed.
- Foot Braking: For more advanced riders, foot braking is an effective technique. With your front foot placed securely on the front deck, lift your rear foot and place it sideways across the back of the Ripstik. Apply gentle pressure to the ground, creating friction and slowing down. Maintain balance and control throughout this maneuver.
III. Additional Tips:
- Terrain Selection: Choose appropriate terrain when learning to slow down. Smooth and flat surfaces with minimal obstructions are ideal for practicing and mastering your technique.
- Gradual Progression: Start slow and gradually increase your speed as you become more comfortable and confident in your ability to control your Ripstik.
- Body Position: Keep your body relaxed and centered, maintaining a low center of gravity. This will improve stability and control while slowing down.
- Protective Gear: Always wear appropriate safety gear, including a helmet, knee and elbow pads, and wrist guards. Safety should be a priority when engaging in any sports activity.
FAQs Related to “How to Slow Down on a Ripstik”
Q1: Is it difficult to slow down on a Ripstik?
A1: Slowing down on a Ripstik can be challenging for beginners, but with practice and proper technique, it becomes easier and more intuitive over time.
Q2: Can I use the same techniques to slow down on a Ripstik as I would on a skateboard?
A2: While some techniques, like foot dragging, can be similar, the unique design and mechanics of a Ripstik require specific techniques such as carving and controlled turns to effectively slow down.
Q3: How long does it take to learn to slow down on a Ripstik?
A3: The time required to learn how to slow down on a Ripstik varies depending on individual skill and practice. With consistent practice, riders can typically start gaining proficiency within a few weeks.
Q4: Is it necessary to wear protective gear when learning to slow down on a Ripstik?
A4: Yes, wearing appropriate protective gear is highly recommended. A helmet, knee and elbow pads, and wrist guards will help prevent injuries in case of falls or accidents while learning to slow down on a Ripstik.
Q5: Are there any specific terrains or surfaces that are best for practicing slowing down?
A5: Smooth, flat surfaces with minimal obstacles or traffic are ideal for practicing and mastering the art of slowing down on a Ripstik. Empty parking lots, tennis courts, or skateparks can provide suitable environments for practice.
Q6: Can I slow down on a Ripstik while going downhill?
A6: Yes, you can slow down while going downhill on a Ripstik by using techniques such as carving, controlled turns, and foot braking. These techniques allow you to maintain control over your speed and ensure a safe descent.
Q7: Is it possible to slow down quickly in case of an emergency situation?
A7: While Ripstiks are designed for cruising and carving, slowing down quickly in emergencies can be challenging. It is best to practice and develop your skills over time to be able to slow down gradually and maintain control in all situations.
Q8: What are some common mistakes to avoid while learning to slow down on a Ripstik?
A8: Common mistakes to avoid include leaning too far back, which can lead to loss of balance, and applying excessive pressure while foot braking, which can cause the Ripstik to abruptly stop and potentially throw you off.
Q9: Can I slow down on a Ripstik if I’m riding at high speeds?
A9: Slowing down at high speeds requires advanced skills and techniques. It is recommended to gain experience and confidence at lower speeds before attempting to slow down at higher velocities.
Q10: Are there any exercises or drills I can do to improve my ability to slow down on a Ripstik?
A10: Yes, you can practice specific drills such as carving in figure-eight patterns, gradually increasing the size of your turns. Additionally, practicing controlled turns and foot braking on various surfaces will help improve your ability to slow down effectively.
Conclusion:
Mastering the skill of slowing down on a Ripstik is essential for both novice and experienced riders. By following the techniques outlined in this comprehensive guide, you’ll be able to ride with confidence, maintain control over your speed, and enjoy the exhilarating experience of Ripstiking to its fullest. Remember to practice regularly, prioritize safety, and gradually push your boundaries to further improve your skills on the Ripstik. Happy riding!